
Master agar techniques for clean mushroom cultures in your home lab.
Summary
Discover five practical hacks to manage contamination, optimize media recipes, and solve common agar problems. Learn how to leverage antibiotic-free methods to empower mycelium, sterilize efficiently, and pour perfect plates, ensuring robust and healthy fungal growth for your urban farm.
Unlocking the Microscopic World
Many aspiring mycologists hesitate to use agar, also known as Agar Agar. I believe this trepidation is unfounded, as agar offers immediate, observable results, providing a rare glimpse into the microscopic world. It allows us to observe and manipulate microorganisms, making it a profoundly intriguing tool for mycology and biology.
When you place a mycological sample onto an agar medium, you are essentially cloning an organism.

This technique allows you to precisely steer growth, unlike using spores, which is akin to a genetic lottery. Cloning enables you to reproduce top-quality specimens by meticulously selecting and transferring specific areas to new plates until uniform growth, or a ‘monoculture,’ is achieved. This monoculture can then be transferred to spawn or used to create liquid culture. While microscopic examination is ideal for confirmation, practical cultivation and repeated transplantation until uniform growth also validate a monoculture’s integrity.
An agar culture, enriched with nutrients, inevitably becomes a breeding ground for both desired life and potential contaminants. This dual nature requires vigilance. Adhering to Aseptic Techniques, is crucial for culture integrity. The fear of contamination is a common discouragement, as agar quickly reveals any issues. Effective sterile methods are key to mitigating these concerns and enhancing success. Contaminants often appear within 24 hours, sometimes ruining a sample. If detected quickly, a grain-sized piece of mycelium can be cut from the edge farthest from the contaminant and transferred to a new plate. A major advantage of agar is speed; discernible growth often appears within 48 hours, offering viable options for transfer if needed. I advise any mycologist or urban mushroom farmer to master agar work before attempting spawn creation.
Hopefully, these hacks will help you overcome initial hurdles.
1. Contamination Hacks: Battling the Invisible Foe
Contamination is a common challenge, especially when cloning from fresh mushrooms, as minute spores are everywhere. Trichoderma spores, for instance, are tiny (3–5 µm long, 2–4 µm wide) and destructive. Trichoderma employs hyperparasitism, penetrating and destroying other fungi, and antibiosis, releasing inhibitory metabolites.
Quickly dispose of contaminated samples; remember, Trichoderma spores are airborne, so keep the plate closed.
The Green Monster Hack: Defeating Trichoderma
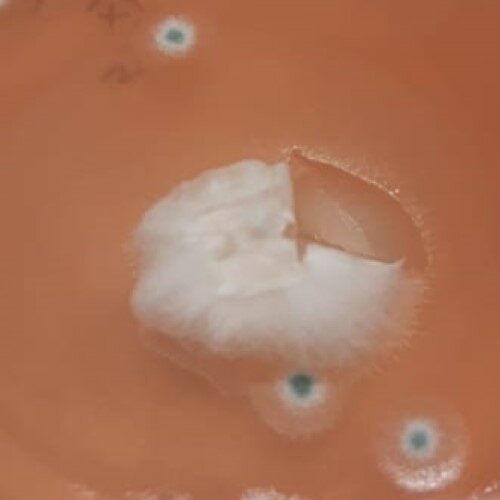
Trichoderma, or green mold, is a cellulolytic filamentous fungus that frequently contaminates mushroom substrates, causing significant crop losses during spawning and cropping. Fortunately, Trichoderma is not very heat tolerant and dies above 60°C. However, it’s ubiquitous, and its light spores are easily transported by drafts.
If you get “Trich,” it’s usually introduced ‘post-sterilization,’ indicating a need to refine your Aseptic Techniques.
As a fungus, Trichoderma is difficult to control as it competes for the same nutrients as edible fungi and has a simpler life cycle. The green color signifies sporulation, meaning the spores are already airborne.
Keep the Petri dish closed and dispose of it far away in the garden, to protect your plants, and keep the spores out of the lab.
If you have a valuable clone, these last-mile steps can be taken:
- First, prepare yourself and your workspace. Shower or scrub thoroughly with medical-grade soap; you are an unwitting carrier of spores. As I like to say… “YOU are the biggest contaminant“
- Spray your work area thoroughly with a 1:9 bleach solution or 0.4% PAA (SteriPmax 628). The damp surface traps errant spores and keep moist – “The wetter, the Better…“.
- Against protocol. turn off your flow hood, converting your cabinet into a ‘still-air box’. Trichoderma is airborne, by design.
- Flame sterilize your scalpel and let it cool.
- Keep a clean recipient Petri dish close.
- Take the contaminated Petri dish and hold it with the majority of green Trichoderma facing downwards (if applicable) on a vertical plane. Hold it up so that when open gravity will pull spores down from your sample if disturbed.
- Carefully open it, quickly take a sample from as far away from the Trichoderma as possible, and transfer it to the new plate.
- Monitor the new plate closely; if any spots develop, immediately transfer a clean piece to another new plate before it turns green.
Please bear in mind, this is a last ditch effort, for critical – or newly cloned samples. Even after the first transfer there may be spores ON the sample, so transfer again from leading edge as soon as possible.
Bacterial Contamination Hack: Tackling Wet Spot / Sour Rot
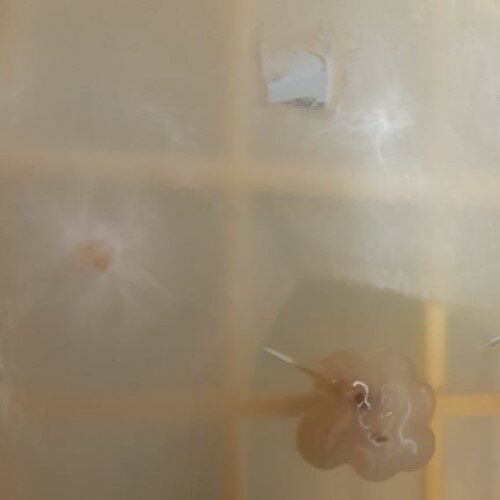
Bacteria are ubiquitous, unicellular microorganisms, varying in shape and typically a few micrometers in diameter. Monera is the largest kingdom in terms of diversity, and among them we get the infamous endospore variants.
“Wet Spot” or “Sour Rot” is a common occurrence in grain spawn jars. Bacillus species survive sterilization in the form of endospores that are highly resistant to heat. When the medium is contaminated with Bacillus, a dull gray slime forms, accompanied by a foul stench, making the grain appear excessively wet—hence the name.
Fortunately, bacterial contamination is easily detected by visual inspection of the culture within a few days of infection.
Antibiotics can be used in agar media to hamper bacterial growth, causing white, mucus-like deposits. Since antibiotics require a prescription, a Peroxide/PAA solution is a common alternative. R. Rush Wayne used 6ml of 3% peroxide per 1000ml of media, added after sterilization (below 60°C) and before pouring. We have extensively tested SteriPmax (4 ml per liter of agar media, similar to peroxide method), which aids pouring, prevents contamination, and significantly slows bacterial growth like an antibiotic.
Bacterial endospores are not airborne, so transferring away from contamination usually solves the problem.
2. Sterilizing Agar Hack: The Foundation of Clean Culture
Agar-Agar, derived from red seaweed, replaced gelatin as the preferred gelling agent in the 19th century. It’s typically added to water at 2%, heated to dissolve, and then sterilized. A 2% solution is good for general maintenance, while 1-1.5% is better for mushroom spores, as they need water to hydrate before germinating (optional to use XA-Gel with agar).
The media solution needs to be sterilized in an Autoclave (15PSI). Fortunately, this can be done in any household pressure cooker (which often only operates at 80 kPa – roughly 10 PSI) for 40 minutes.
Keep sugar content below 2% by weight; too strong a media inhibits mycelial growth (see Nutrient Hack below).
Peroxide Sterilization Microwave Hack
R. Rush Wayne introduced peroxide into agar, to the mycological world, but few people may know he actually based this on a technique for making peroxide agar for growing orchid seeds?
Most people know that peroxide is a disinfectant, but few are aware that peroxide (H₂O₂) becomes sporicidal above 60°C, and kills endospores. Peroxide also quickly dissociates back to water and oxygen above 80-90°C. These characteristics can be used to sterilize your agar in a microwave very quickly and efficiently, with no residual after-effects, as all peroxide would have degraded into water and oxygen.
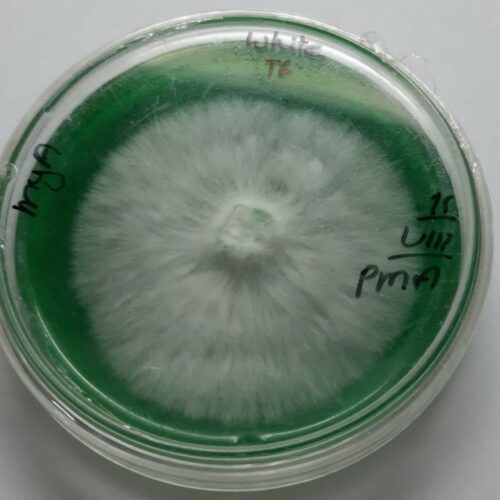
Microwave Sterilization Steps:
1. Prepare agar media in a microwavable container (e.g., polypropylene 1000ml screw-top).
2. Heat in microwave until it just begins to boil.
3. Remove, cool for a minute till bubbles stop, then add 20 ml of 3% peroxide per liter of media.
4. Return to microwave, heat to boiling point again, under supervision.
5. Reduce power to lowest setting and simmer for 8 minutes.
If your microwave too powerful leading to boiling, then place a second- or even third – container with water to disperse the power.
6. Remove and pour plates at the coolest comfortable temperature to minimize condensation, as per usual PC routine..
PS: This peroxide method does not work with normal pressure cooker sterilization; agar will not set. For PC sterilization, add peroxide after sterilizing as per R. Rush Wayne.
Horror vacui [Aristotle]: Latin phrase that means “fear of the void” or “fear of empty space”, often termed “Nature hates a Vacuum”.
After sterilization, consider your media a biological vacuum; apply all Aseptic Techniques to maintain sterility when exposed to the environment.
Though ancient now, refer to Pasteur’s “Germ Theory of Disease” – the basis of aseptic methodologies.
3. Pouring Petri Plates Hack: Precision in Practice
Pouring clean Petri plates requires practice and strict aseptic principles.
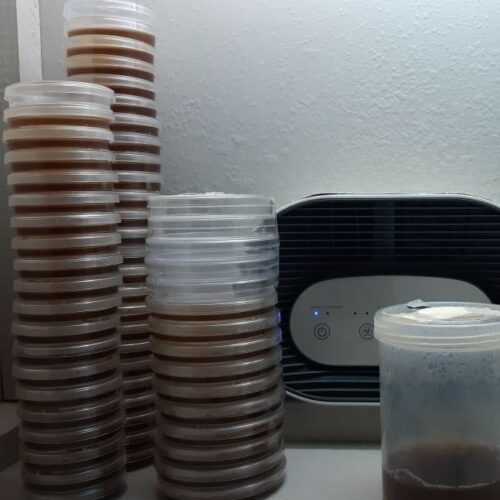
Preparation and Technique:
1. Blitz workspace: Spray your Still Air Cabinet (minimum) with a 1:9 bleach solution. A damp surface traps spores.
2. Blitz yourself: Shower and sanitize hands with 70% rubbing alcohol; you are the biggest contaminant.
3. Work methodically, keeping Petri plates open minimally. While traditional Petri dishes are clear, our Polypropylene screw-Petri are pre-sterilized but melt/go opaque at higher temps.
4. Cooling for Condensation: Cool agar before pouring to prevent condensation. Agar melts at 85°C and sets at 32-40°C. Pour when you can comfortably hold the container.
5. Pouring Technique: Place the Petri dish on a raised platform (e.g., the 1000 ml PP screw-tub from the Petri Dish Kit). Hold the lid with one hand, quickly pour media with the other, and replace the lid.
Stacking and Insulation:
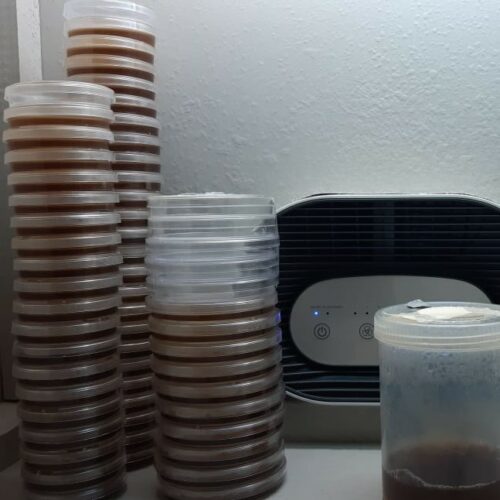
- Stack the filled Petri dishes on top of each other.
- Once finished, place an empty Petri dish containing warm water on top of the stack.
- Even better, use the 1000ml tub from the Petri Dish Kit and place it over the entire stack.
- If your work is complete, you can also turn off your flow hood.
- The idea is to use insulation to cool the plates down more slowly, which is crucial for preventing condensation on the inside of the lids.
- This also relates to pouring temperature; the cooler the better, which comes with experience.
- Once cooled, store the Petri dishes in an upside-down position. Any condensation will then collect in the lid for later disposal and will not streak or breed contaminants on the agar surface.
4. Media Recipes Hack: The Nutritional Edge
This is where the magic comes in, as you can control mycelial growth by using varied forms of nutrition. There is a theory that to prevent senescence (aging) of mycelium and stalling, it’s beneficial to alternate between nutrients rather than using the same continually.
Agar Prep Hack: Steep, Don’t Boil!
When preparing agar, many recipes call for boiling. However, we’ve found it’s actually better, and easier, to steep rather than boil your nutrients. First, bring the water with agar to a light boil just to melt and dissolve the long agar threads. Then, turn off the heat and stir in your selected nutrients. This prevents the messy foam-overs often associated with boiling nutrient-rich solutions.
The “Anything Goes” Principle (with caveats!)
When it comes to agar media recipes, literally ‘Anything Goes’ from Marmite to Maltabella. For inspiration and a wide range of recipes and preparation methods, refer to “Fast Fred’s Media Cookbook” .
For mycology, just stick to the following three almost Cardinal Rules:
- Carbohydrates (Sugars) < 2% (20 grams per liter): Avoid high concentrations of sugars. While mycelium needs carbon, some, like sucrose (table sugar), may not be readily broken down by all fungal enzymes. It’s an urban myth that mycelium cannot use sucrose, as many fungi produce invertase enzymes, but it’s generally quicker to use simpler sugars like dextrose (glucose) or fructose to avoid potential issues or slower growth.
- Proteins < 0.5% (5 grams per liter): Excessive protein can lead to bacterial contamination and unwanted growth.
- Salt < 0.1% (1 gram per liter): High salt content (sodium chloride) creates osmotic stress, which can inhibit or kill mycelial growth. A general safe osmotic limit is considered to be around 0.1%. Be mindful of ingredients like Marmite, which can be high in salt.
5. pH and Agar Alternatives: Fine-Tuning Your Media
One word of warning here is that there have been cases of Agar Agar not setting (notably MEA), and this is often due to an overlooked aspect of pH. With a low pH (an acidic solution), the agar will not gel, creating a slimy mess. This has happened with grain water (think too old/late when one got around to it and it started fermenting?) and potatoes (they are acidic, and even FastFred mentions that PDA should only be reheated once).
I now add a dash—literally a pinch—of Calcium Carbonate (CaCO3) to the media when cooking (1/2 gram per liter for the pedantic). The CaCO3 will react with any acids to form CO2, and any excess will remain as solids that are easily filtered out. Touch wood, it has never happened again.
GELATIN: A Less Ideal Alternative
Gelatin (think Jelly) is a translucent, colorless, flavorless food ingredient, commonly derived from collagen taken from animal body parts such as bones. Originally, this was what was used for media plates, but it was quickly replaced with the advent of Agar Agar. The problem with Gelatin is that it is a complex protein (peptones are simple proteins that often come from a similar source – just broken down with acid hydrolysis) and thus is not inert to mycelium. When I tested it, the mycelium literally ate it up, forming a watery puddle in the middle… For serious mycological work, agar remains the superior choice – though can supplement with Xanthan gum.
-
STS
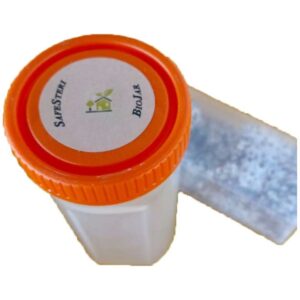
Mushroom Spawn Jar 320ml – Sterilized Sorghum Grain
Price range: R150 through R720 Select options This product has multiple variants. The options may be chosen on the product page📦 Sterilized Sorghum Grain Mother Spawn Jar
📦 320ml Reusable BioJar, Shatterproof PP5.
📦 Positive-Seal (No Gaskets).
📦 0.25μm ePTFE filter. -
STS
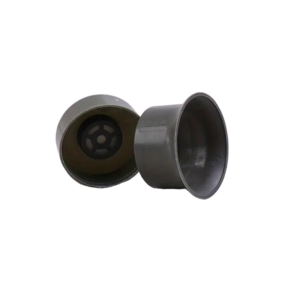
Mushroom Spawn bag Cap and Lock Ring [30mm]
Original price was: R12.R10Current price is: R10. Add to basket🏗 Professional-grade sealing for mushroom spawn bags
🏗 Autoclavable 30mm caps with lock ring
🏗 Smaller filter area retains moisture/CO₂ for spawn runs -
STS
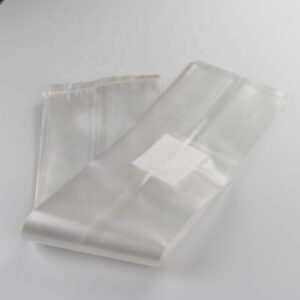
10x8x50cm Gusseted Spawn Bag | 0.2μm Filter Patch
Price range: R13 through R995 Select options This product has multiple variants. The options may be chosen on the product page🧫 Autoclavable Polypropylene mushroom spawn bag
🧫 High-flow 0.2μm filter patch.
🧫 Gusseted stand-up design – 10x8x50 cm
🧫 Suitable for grain spawn -
STS
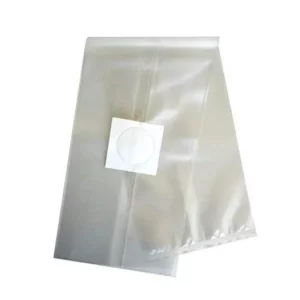
20x12x50 cm Gusseted Spawn Bag [0.2μm Filter]
Price range: R17 through R1,308 Select options This product has multiple variants. The options may be chosen on the product page📦 Commercial-grade 60 Micron Polypropylene.
📦 Non-woven 0.2µm ePTFE filter patch.
📦 Maximum sterility during grain spawn production.
📦 Gusseted design – Autoclavable up to 126°C.
Socratic Questions:
- How can I identify and prevent common bacterial contamination like “Wet Spot” in my cultures?
- What is the optimal temperature range for pouring agar plates to minimize condensation?
- Why is aseptic technique so critical when working with agar, especially after sterilization?
- What are the advantages of using peroxide or SteriPmax in agar media for contamination control?
- How do different agar media recipes, like MEA, PDA, and OA, influence mycelial growth and acclimatization?
Brilliant piece. Loved reading on how I can improve my agar work.
I’m so happy I found this site! I’ve never been one for scouring around too much. I know now that this art is obtained by repetition and experience which these articles have plenty of. I like to stick to peer-reviewed books, so as to not be thrown around by filing multiple people’s advice. I think this is great!! the whole site/shop everything!!