Learn how to maximize egg laying and harvest worms easily without sorting through muddy bedding.
Summary
This lab note details the practical mechanics of high-density worm breeding (vermiculture). It covers why breeder bins need to be wetter than standard Continuous Flow-Through (CFT) systems, how to prepare feeding, the “line-feeding” trick that increases mating, and a quick overnight harvesting technique to separate adult worms from their eggs.
1. The Core Secret: Composting vs. Breeding
Breeding worms is a specialized process distinct from vermicomposting, where the primary goal is to produce vermicompost. In worm breeding, the focus is on maximizing worm reproduction, also called Vermiculture. This note will guide you through setting up and maintaining worm breeder bins to achieve optimal breeding conditions.
A common mistake is trying to breed worms in a standard compost bin or a Continuous Flow-Through (CFT) system.

They are two different setups with different goals:
- Vermicomposting: The goal is making worm castings. The bins use drainage holes and are kept at a moderate 60–70% humidity so the compost stays airy and loose.
- Vermiculture (Breeding): The goal is maximizing worm reproduction. These bins have no drainage holes and are kept as wet as possible without creating stagnant pools (field capacity). Worms are also fed minimal pre-digested food to accelerate ‘cocooning’.
Worms lay far more cocoons (eggs) in wet bedding. By controlling the moisture, you signal the worms to shift into high-gear breeding.
2. Setting Up Your Breeder Bin
Worms will not hatch if the bin becomes overcrowded. To beat this, we use small, shallow bins with large surface area to volume, let the adults mate for a few weeks, and then move them out so the cocoons will hatch. And babies have room to grow to give a same-aged population.
Materials List:
- Shallow plastic trays (like cat litter boxes) with no holes
- Sifted vermicompost or aged compost for bedding
- A few handfuls of shredded newspaper or cardboard
- Bubble wrap and a sheet of thick black plastic cut to fit the tray
- SPeS VermiBoost (or pulverized worm food)
- Potatoes, sweet potatoes, and a banana
Step-by-Step Assembly:
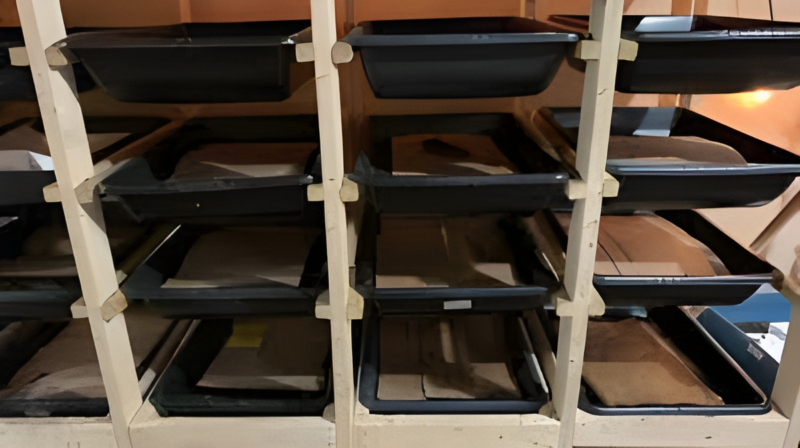
- The Base Layer: Toss a handful of shredded paper at the bottom of the tray to absorb pooling water.
- The First Bedding Layer: Add 5 liters of sifted compost moistened to field capacity. (Field capacity means when you squeeze it hard, only a drop or two of water comes out, but it holds its shape).
- The Center Spacer: Lay down another handful of shredded paper to keep the layers aerated.
- The Top Bedding Layer: Add another 5 liters of moist compost on top.
- The Covers: Place a sheet of bubble wrap (bubbles facing down) directly on the bedding to allow airflow. Cover that with the black plastic sheet to keep the tray pitch black and lock in moisture.
If you are new to composting and do not yet have access to vermicompost, it is recommended to use fully decomposed compost from the bottom of your compost bin, or alternatively, you can utilize leaf litter.
Add the Breeders:: Add 150 worms to each tray, adhering to the optimal breeding density of 200 worms per square foot of surface area.
3. The Line-Feeding Mating Trick
Worms don’t have eyes or ears; they find mates by pure chance of contact. If you scatter food all over the bin, the worms scatter too, which drops your mating rates.
The Gourmet Feed Recipe:
- Boil 2 sweet potatoes and 1 normal potato until soft, then let them cool.
- Mix in a teaspoon Vermi-Syn³
- Blend mix with 1 banana and a splash of water until you get a smooth puree.
- Allow to stand for 3-4 days, then feed bin.
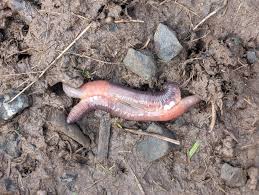
Vermi-Syn³ is pre-fermented high protein feedstock, which introduces the full soil biome, and starts decomposition of the feed puree.
Paradigm Shift #2: Worms do not eat organics, they eat the microbes decomposing the organics.
How to Feed:
Instead of spreading the puree, pour it in two straight parallel lines across the bedding (or in a neat circle).
When you cover the bin, the worms will crowd tightly together along those exact food lines. This constant, forced physical contact drastically increases mating (Cocooning) and results in dense clusters of cocoons laid right in the feeding zones. Only feed once a week – what they can finish in 3 days.
Overfeeding:
In a large composting bin, you can add raw kitchen scraps without much worry. The existing soil biome breaks them down first, and the worms simply move away from the active decomposition zones until the food is ready. If a scrap load is too high in nitrogen (protein), it triggers thermophilic bacteria that cause the organic matter to heat up drastically; the worms will simply stay clear until it cools down.
However, in a small breeder bin, you do not have these spacious “safe zones.” The worms have nowhere to run if the bedding heats up or goes sour, and low pH will kill cocoons. Because of this, we use a pre-decomposed or cooked puree and apply it only in small, localized lines, ensuring the food is immediately stable and safe for a confined space.
4. The Overnight Siphon Harvest (Clearing the Adults)
Red Wiggler cocoons will refuse to hatch if they sense the bin is already full of adults. To keep production moving, you need to remove the parents after 3 to 4 weeks.
[ Weeks 1-3: Line Feeding ] ──> Worms spread out along lines to mate and lay eggs.
[ Week 4: Central Trap ]    ──> One pocket of food draws the entire adult population into a ball overnight.
Because breeder bedding is very wet, sorting them by hand is a messy nightmare. Use this simple trap instead:

- The Trap Setup: Three weeks after starting the bin, skip the parallel lines. Dig one deep, central pocket right in the middle of the compost.
- The Bait: Pour 1 cup (250ml) of your potato-banana puree into that central hole and cover the bin.
- The Catch: By the next morning, almost every single adult worm will have tangled themselves into a massive ball inside that food pocket. Gently scoop the whole cluster out in one motion.
- The Reset: Move those adults into a freshly prepared tray to start the next breeding cycle.
5. Raising the Nursery Trays
Once the adults are siphoned away, the original tray becomes a dedicated nursery full of golden, lemon-shaped cocoons.
[Amber Cocoon (21 Days)] ──> [White Hatchling (10mm)] ──> [Juvenile (40-60 Days)] ──> [Breeding Adult (90 Days)]- The Eggs: Cocoons start out light golden and turn dark amber. They take about 3 weeks to hatch, usually releasing 2 to 5 babies each.
- The Hatchlings: Babies emerge white or translucent, less than 10mm long. They will slowly turn red over time.
- The Juveniles: For 40 to 60 days, they eat and grow but cannot breed yet.
- The Adults: At around 90 days, they develop a swollen band (clitellum) near their head. They are now fully mature.
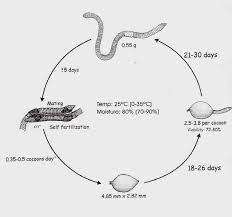
Nursery Care Note: Because the adults are gone, the nursery tray needs very little food at first. Give it small, light dustings of Vermi-Syn3, and slowly scale up the portions as the thousands of hatchlings grow into hungry juveniles. In about 3 months, you can dump this high-density population straight into your active composters or start the breeding cycle all over again.
Conclusion
By keeping your breeding loops separate from your main composting bins, you get complete control over your worm supply. It takes just a few repurposed trays, a simple feeding geometry, and a regular monthly routine to build a massive, self-sustaining biological engine for your farm.
In the practice of vermicomposting, our focus is on the production of vermicompost, while vermiculture is centred around the cultivation of worms. Although both processes utilize the same foundational equipment, primarily repurposed old buckets, here are a few key points to consider:
- Keep the bedding as wet as possible, without stagnant water, this is a requirement for high cocoon formation and hatching.
- Remove the starter worm population after a month, and start a new breeder bin, repeating process.
- After removal of starter population then carefully monitor breeder bucket, as feeding requirements will be lower, slowly ramping up as worms mature.
- After 2-3 months then the breeder bucket will be through the vermicomposting worms life-cycle and self sustainable giving monthly harvests of adult worms.
- Bear in mind the volume of bin smaller and less area for worms to escape to hotspots, make feed portions smaller that can be consumed within 3 days.
- By laying the food in lines, or a circle, congregates the worms along the line – and this unconscious contact between the worms is important for fertilisation and cocoon formation.
Happy worm breeding!
-
STS
Elephant Garlic Start Kit | GroCormZ
Original price was: R75.R49Current price is: R49. Add to basket🌱 Produces Authentic Ajo Macho (Solo Garlic)
🌱 Encapsulated Elephant Garlic Corm Included
🦠 Terra Preta Nova Biological Grow Ball
💧 Just Plant, Water & Grow — Pointy Side Up! -
STS

STS “Buffer-Charge” | Professional 5kg Coco Coir Conditioner
Original price was: R39.R30Current price is: R30. Add to basket Stop “washing” your coir and start charging it.
Pre-measured, dry-sachet conditioning system.
Removes the natural sodium and potassium salts in coco coir.
Provides an engineered environment for your plants to thrive from day one. -
Organic Elephant Garlic Rounds (Ajo Macho / Solo Garlic)
R90 Read more🌱 Large, mild-flavoured single Ajo Macho bulbs
🌱Organic Elephant Garlic Rounds / Pearl / Solo
🌱 Vernalized for immediate planting or roasting
🌱 Seasonal – Limited Stock -
STS
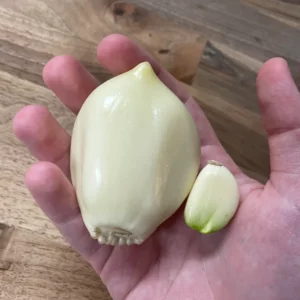
Elephant Garlic Tincture (1:5 AGE Extract ) | 20.4% ABV
Original price was: R450.R295Current price is: R295. Add to basket🛠️Concentrated, Biologically Active Phytochemical Extract
🛠️ Optimized 1o-Min Air-activated Allicin window (AGE)
🛠️1:5 Fresh Organic Garlic Ratio
🛠️Stable 20% ABV Matrix – Long shelf life
Socratic Questions
how to breed red wiggler worms in binshow to separate adult worms from cocoons easilydiy worm breeder box without drainage holeshomemade worm food puree recipe for breedinghow often do composting worms lay cocoons