
Lesson 2: Essential Gear and Tools for Mycologists
Introduction
What does it take to turn a handful of grain into high-quality mushroom spawn? The answer lies not just in technique but in the tools you use. In this lesson, we’ll explore the essential gear for making mushroom spawn, from pressure cookers to inoculation tools. Whether you’re setting up a small DIY operation or scaling up to commercial production, choosing the right equipment is critical for success. Let’s start with a question: What tools do you think are non-negotiable for keeping your spawn free of contaminants?
Pressure Canners: The Heart of Sterilization
The cornerstone of spawn production is a pressure canner capable of reaching 121°C (250°F) at 15 PSI (103 kPa). Why is this specific temperature and pressure so important? As we learned in Lesson 1.1, this is the minimum required to kill endospores in grains, which are notorious for harboring contaminants. A standard pressure cooker, especially in non-US countries, often operates at 80 kPa (11.6 PSI), reaching only 115°C—insufficient for grain sterilization. This limitation led to many failed spawn batches for growers unaware of the difference – especially in no-US countries, like South Africa.

When selecting a pressure canner, look for models like the All-American or Presto, which meet ASME VIII standards for 15 PSI. These are widely used in the US and ensure reliable sterilization. For small-scale setups, a 23-quart canner can handle multiple 750ml jars or up to six spawn bags. For commercial operations, consider larger models or autoclaves.
Containers: Jars and Bags
Your spawn needs a sterile home, and the two most common containers are glass jars and polypropylene spawn bags. For beginners, 500ml glass jars (like mason jars) are ideal for small batches (200–300ml of grain), allowing easy mixing and effective sterilization.
Polypropylene bottles or bags are better for larger volumes (1 kg up to 5kg), as they can withstand high-pressure sterilization and offer HEPA-quality heat-sealed filter patches for gas exchange. For spawn it critical to get 0.22 micron filter patches – beware there are 0.5 micron patches which is for supplemented [protein enriched] substrates or grow bags.
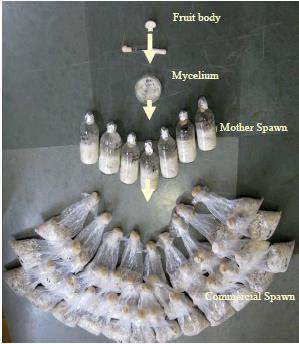
Another factor is the volume – in short smaller volumes will attain sterilization temperature quicker – and smaller is better in terms of sterilization efficiency. For mother spawn [inoculating grain directly from Agar] it is advised not to over 300ml, as only putting one or two pieces of agar.
Inoculation Tools
Inoculation is where precision meets sterility. You’ll need:
- Syringes (10–20ml) for liquid cultures, fitted with 16-gauge needles for precise delivery.
- Scalpels for transferring agar wedges, sterilized with flame or alcohol.
- Alcohol lamps or butane torches for flame sterilization, ensuring tools remain contaminant-free.
- Gloves and alcohol wipes to maintain a sterile workspace.
These tools are critical during the inoculation process, which we’ll cover in Module 4. For now, consider: How might a single unsterilized tool ruin your spawn?
Filtration and Air Exchange
Mycelium needs oxygen, but contaminants must be kept out. Use hydrophobic filter materials like Polyfill or commercial filter patches (0.22 micron PTFE) on jar lids or spawn bags. For containers there is now 0.22 micron filter patches that can put on – but the norm is to install syringe filters. These need to be affixed to the lid with red RTV [Room Temperature Vulcanizing] Silicone.
Beware do not use “Hydrophilic” materials, like cottonwool, which absorbs moisture and becomes a “contamination haven.” External contaminants will literally grow through the filter to contaminate the spawn. Filter patches on spawn bags allow sterile air exchange while blocking spores like Trichoderma.

Airport Jars
For years glass mason jars was used with a hole in lid and Polyfill [Polypropylene stuffing] used in lids – before the advent of Polypropylene Spawn bags with PTFE 0.22 filters.
These ‘Airport’ Jars though are quite dangerous as have to be kept above the level of water in trivet – else will get temperature microfractures – at best bottom will fall off. At worst though the microfractures weaken the glass and will shatter when banged to mix the spawn – lacerating your hand. Furthermore the metal lids were prone to rusting around the filter hole which will lead to a contamination vector.
It is advised to repurpose glass bottles with polypropylene lids, instant coffee jars, as they will not rust.

For this purpose we designed BioJar, full polypropylene 320 ml jar build, with double seal lid and PTFE 0.22 micron filter port. Specifically for Mother Spawn and negating these problems of conventional glass Airport jars.
Choosing Gear for Your Scale
For a DIY setup, a 23-quart pressure canner, mason jars with modified lids, and a DIY Still Air Box (SAB) are cost-effective and sufficient for small batches. The SAB, which we’ll cover in Module 3, provides a low-cost sterile workspace.
For commercial operations, invest in larger pressure canners, autoclaves and flow hoods for higher throughput and efficiency. A flow hood provides a sterile air stream, reducing contamination risks significantly but at a higher cost. What scale are you aiming for, and how might that influence your equipment choices?
Socratic Wrap-Up
Let’s reflect:
Why is a pressure canner at 15 PSI non-negotiable for grain spawn?
Grain naturally harbors heat-resistant bacterial endospores, typically from Bacillus species. These endospores have protective coatings that allow them to survive elevated temperatures, radiation, and even long periods of dormancy. To effectively destroy them, grain must be sterilized using saturated steam at a minimum of 15 PSI (103 kPa)—equivalent to one atmosphere of pressure. This level of pressure ensures temperatures reach around 121°C (250°F), which is necessary for true sterilization. Most traditional pressure cookers don’t reach this threshold, making a proper pressure canner essential for safe and contamination-free grain spawn production.
How do your container choices (jars vs. bags) impact your workflow?
For beginners, small volumes of grain (under 300 ml) can be handled in airport jars, which are compatible with a Still Air Box (SAB). Jars are compact and easy to sterilize and inoculate in limited space. However, for larger quantities, spawn bags are preferred. These require more vertical working space—at least 60 cm in height—making them unsuitable for SAB use. Spawn bags also need to be sealed with a heat sealer in a clean environment, adding complexity to the workflow. So, your container choice directly affects the tools, space, and techniques you’ll need.
Why do you think smaller containers are recommended for beginners?
Smaller containers are advised for initiates as easier to handle in SAB. Actually as rhetorical question as smaller containers are advised for Mother Spawn for professionals too – as the smaller volume allows quicker and more effective sterilization of the natural endospore count in cereal grain – to aid colonization speed when inoculating with agar.
Why do you think proper filtration is so critical during spawn colonization?
While spawn requires oxygen to grow, it also tolerates elevated levels of CO₂. This means air exchange is necessary—but it must be filtered to prevent airborne contaminants from entering the container. One of the most common threats is Trichoderma, a mold with spores smaller than 0.5 microns, which can easily infiltrate unfiltered or poorly filtered setups. That’s why commercial spawn bags use 0.22 micron filters—small enough to block contaminants while allowing gas exchange. If contaminants breach the filter, they can rapidly colonize the nutrient-rich sterilized grain, rendering the spawn unusable.
What might happen if you try to sterilize grain spawn with a pressure cooker that only reaches 80 kPa?
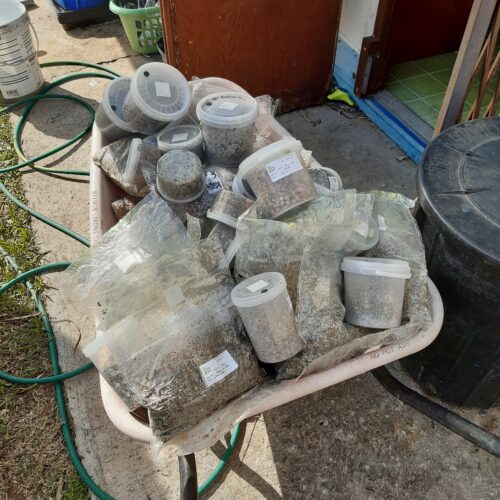
Grain contains resilient Bacillus endospores that require 121°C steam at 15 PSI (103 kPa) to be destroyed. At just 80 kPa, true sterilization doesn’t occur—especially in dry substrates like grain. I learned this the hard way: small batches sometimes worked, but most failed, leading to massive waste. I discarded discarded heaps of contaminated spawn before realizing my pressure cooker wasn’t up to the task – and only reaching 80kPa.
Unlike agar or liquid culture, grain needs full sterilization. Without a proper pressure canner, contamination is almost guaranteed.
The right tools set you up for success by ensuring sterility and efficiency. In the next lesson, we’ll dive into the science of sterilization and why it’s the backbone of clean spawn production. Ready to learn how to defeat the “green monster” of contamination?