Achieve a 90% reduction in water usage and consistent year-round yields in high-temperature
African climates using this professional Deep Water Culture (DWC) framework. This 3,000-word engineering blueprint covers tray dimensions, active aeration rates, and nutrient management for scalable, low-cost lettuce production in resource-poor environments.
This blog/tutorial stems from my own experiences with hydroponically cultivating lettuce. After successfully growing spinach, kale, and even elephant garlic, I encountered challenges with lettuce. These issues were eventually resolved, and I decided to create this blog to highlight a specific crop, a system, and the methodologies involved. I hope this not only assists you in your urban farm but also addresses any problems you might be facing in your current setups.
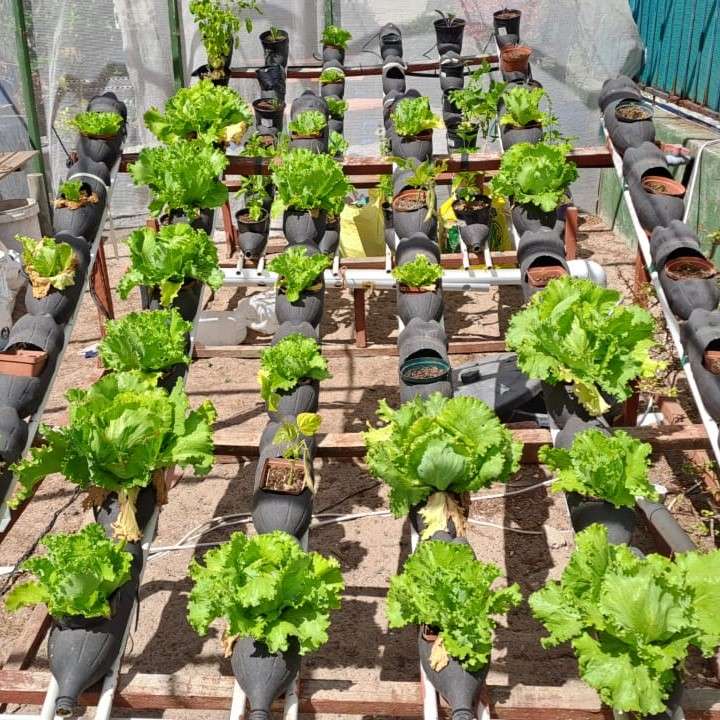
Hydroponics is revolutionizing agriculture across Africa and the world, offering a sustainable and efficient way to grow crops without soil. One of the most promising applications of hydroponics is the cultivation of lettuce using Deep Water Culture (DWC) systems. This method not only maximizes space and resources but also ensures faster growth and higher yields.
1. Introduction: Why Commercial Raft DWC?
Welcome to the future of high-density, water-efficient agriculture. This tutorial is designed for growers, entrepreneurs, and agricultural projects looking to scale up hydroponic lettuce production using a raft-based Deep Water Culture (DWC) system.
What is Commercial Raft DWC?

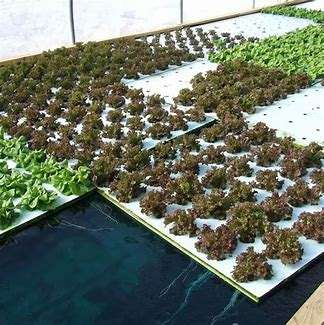
Deep Water Culture is a hydroponic method where plants grow with their roots suspended directly in a nutrient-rich, oxygenated water solution. In the commercial raft model, plants are supported by floating boards (or “rafts”) on the surface of large, shallow channels or tanks. Unlike small-scale bucket systems or media-based methods, this approach uses no growing media, with roots bathing freely in the solution, leading to exceptionally fast growth rates.
The Strategic Advantage for African Agriculture
For regions facing water scarcity, unpredictable rainfall, and declining soil fertility, commercial DWC presents a transformative solution:
- Maximized Water Efficiency: DWC uses up to 90% less water than traditional soil-based farming by recirculating water and eliminating runoff and evaporation.
- Space and Land Optimization: This system allows for very high plant densities, enabling significant production on small parcels of land—ideal for peri-urban and urban farming initiatives.
- Accelerated Growth Cycles: With constant access to oxygen, water, and nutrients, lettuce plants in a well-managed DWC system can reach maturity significantly faster than in soil, allowing for more crop cycles per year.
- Simplified Labour and Management: The raft system simplifies planting, maintenance, and harvesting. It eliminates labour for weeding, tilling, and most pest control, focusing management on water chemistry.
- Year-Round, Predictable Production: By controlling the root zone environment, you can produce consistent, high-quality lettuce regardless of external weather conditions, ensuring a reliable supply for markets.
This tutorial will move beyond theory and hobbyist-scale setups. We will provide a detailed, practical blueprint for designing, building, and managing a robust and profitable commercial DWC operation, starting with the very heart of the system: correct aeration.
2. Core System Design & Components
A successful commercial DWC system relies on robust and correctly sized components. Unlike small-scale setups, commercial design prioritizes durability, ease of management, and efficient resource use.
Key Components of a DWC System
- Reservoir: A container to hold the nutrient solution. We will look at an 2mx0.8m tray with a water depth of 25cm.
- Air Stones and Air Pumps: These ensure the water is aerated, providing oxygen to the roots.
- Styrofoam Slabs/Rafts: Floating slabs with holes cut for net pots, allowing the plants to float on the water surface.
- Nutrient Solution: A balanced mix of essential nutrients dissolved in water to feed the plants.
- Net Pots: Small pots that hold the plants and growing medium.
- Growing Medium: Materials like clay pellets or rock wool that support the plants.
A. The Growing Channel / Reservoir
This is the foundation of your system. Its primary job is to hold the nutrient solution while being light-proof and inert.
- Material & Construction:
- Food-Grade Liners: A highly effective and low-cost method. Dig a level trench or build a frame from wood or cinderblocks and line it with a high-quality, black PVC or EPDM pond liner. Ensure it is 100% light-proof to prevent algae growth.
- Dedicated Channels: Commercially available DWC channels made from UV-stabilized PVC or other plastics offer a “plug-and-play” solution, though at a higher cost.
- Built-In Tanks: Fiberglass or coated concrete tanks are a permanent, durable solution for large-scale installations.
- Sizing & Geometry:
- Shape: Long, rectangular channels are standard for raft systems, allowing easy access and raft movement.
- Width: Keep channels to a maximum of 1.5 meters wide to allow easy reaching to the center for planting and maintenance from the sides.
- Depth: A depth of 20-30 cm (8-12 inches) is ideal for lettuce. It provides sufficient root volume without requiring an excessive amount of nutrient solution.
- Example: Our 2m (L) x 0.8m (W) x ~0.25m (D) channel is a perfect model, with a water volume of approximately 200 liters and a surface area of 1.6 m².
- Height: For ease of operations and less-stressful work the bottom of the tank to be 600mm high to allow easy maintenance.
B. The Aeration System: The Heart of DWC
This is the most critical component. Without oxygen, roots drown. For commercial raft DWC, we use a surface-area-based standard, not the volumetric rule used for deep buckets.
- The Commercial Standard:Provide a minimum of one airstone with an output of 4-5 Litres Per Minute (LPM) for every 2–4 m² of water surface area.
- For your 1.6 m² channel: A single 4+ LPM airstone is sufficient.
- For larger channels: Space airstones evenly along the bottom to create a uniform “boiling” effect across the entire surface, ensuring no oxygen-depleted zones.
- Component Breakdown:
- Commercial Air Pump: Do not use small aquarium pumps. You need a heavy-duty, piston or diaphragm compressor designed for aquaculture or hydroponics. These are rated by their total LPM output (e.g., 40 LPM, 80 LPM). For a multi-channel system, select a pump whose total LPM capacity meets or exceeds the sum of your airstone requirements.
- Air Manifold: A central pipe or distribution block that splits the pump’s single output into multiple lines for each airstone in your system.
- Airline Tubing: Use high-quality, non-toxic vinyl tubing to connect the manifold to the airstones.
- Check Valves (Non-Return Valves): These are non-negotiable. Install one in each airline before it enters the water. They prevent water from siphoning back into and destroying your air pump during a power outage.
- Airstones/Diffusers: Use commercial-grade, cylindrical or disc-shaped airstones designed to produce a curtain of fine bubbles, maximizing the oxygen transfer surface area.
Proper aeration is essential for the health of the plants’ roots. The general guideline for aeration in small hydroponic Dutch Bucket/RDWC systems is to provide around 1-2 litres of air per minute (LPM) for each gallon of water.
But for commercial raft systems we work on 4-5 Litres Per Minute (LPM) for every 2–4 m² of water surface area – and for larger systems worm on.
Aeration Sizing Guide
| Channel Surface Area | Recommended Airstones | Minimum Total Airflow |
|---|---|---|
| 2 – 4 m² | 1 x 4-5 LPM stone | 4-5 LPM |
| 4 – 8 m² | 2 x 4-5 LPM stones | 8-10 LPM |
| 8 – 12 m² | 3 x 4-5 LPM stones | 12-15 LPM |
C. The Floating Rafts
The rafts support the plants, block light, and reduce evaporation.
- Material: Extruded Polystyrene (XPS) Foam. This is the industry standard. It is buoyant, does not waterlog, and provides good root zone insulation. Do not use expanded polystyrene (EPS), as it is fragile and can disintegrate.
- Preparation:
- Cut to Fit: Cut the sheets to float snugly within your channel, with a small gap (1-2 cm) on the sides to allow for easy movement.
- Hole Spacing: Drill evenly spaced holes for your plants. A common spacing for lettuce is 20-25 cm (8-10 inches) center-to-center. Hole size should accommodate a net pot or simply support the seedling plug.
Durability: XPS rafts are reusable for many cycles. Clean and disinfect them between plantings.
D. Nutrient & Environment Management
- Hydroponic Fertilizer: Use a high-quality, complete, water-soluble fertilizer designed for hydroponics. It must contain all essential macro and micronutrients [Hoagland Formula] and aim for 1000-1200 μS/cm.
- Water Pump (for Recirculation – Optional but Recommended): While a single tank can be managed standalone, connecting multiple channels to a central sump tank with a water pump makes nutrient management, pH adjustment, and temperature control far more efficient. This evolves the system into a Recirculating DWC (RDWC). The recirculating reservoir mounted lower level, ideally in the ground and Level control easily maintained by overflow mounted at required depth in the channels.
- Monitoring Tools:
- pH Meter: Essential for daily monitoring.
- EC/TDS Meter: Essential for monitoring nutrient strength.
- Water Thermometer: Critical, as high water temperature is the primary cause of root disease, and bolting of lettuce.
3. Step-by-Step System Setup & Planting
This section transforms your components into a functioning system. Precision and cleanliness during setup prevent most common problems down the line.
Phase 1: Assembly and Preparation
Step 1: Install and Prepare the Reservoir
- Ensure your channel or tank is perfectly level on a stable base. An unlevel tank will have uneven nutrient depth.
- If using a liner, ensure it is smooth, with no folds that could trap debris. Secure it firmly over the frame.
- Clean the reservoir thoroughly with a mild disinfectant (e.g., food-grade hydrogen peroxide or a diluted bleach solution) and rinse well.
Step 2: Install the Aeration System
- Place the Air Pump: Install your commercial air pump in a protected, well-ventilated location ABOVE the water level of your reservoir, if possible. This, combined with a check valve, is the best defense against water backflow.
- Lay the Airstones: Place the airstone(s) evenly spaced along the bottom of the dry reservoir. For your 2m channel, one in the center is ideal.
- Run Tubing and Install Check Valves: Connect the airstones to the airline tubing. Install a check valve in each line, ensuring the direction of flow (usually marked with an arrow) points towards the airstone.
- Connect to Manifold and Pump: Connect the individual lines to your air manifold, and the manifold to the main air pump.
- Test the Aeration: Fill the reservoir with a small amount of clean water and power on the pump. Verify that all airstones are producing a strong, consistent stream of fine bubbles. Adjust connections if necessary. This test confirms everything works before you add nutrients.
Step 3: Prepare the Floating Rafts
- Cut your XPS foam to the correct size.
- Drill planting holes with a hole saw. A 5-7 cm (2-3 inch) diameter is standard.
- Optional but Recommended: If not using net pots, you can line the holes with foam collars to better support the seedlings.
Phase 2: The First Nutrient Solution
Step 4: Fill and Mix
- Fill the reservoir with water to about 2-3 cm from the top.
- Add your hydroponic nutrients according to the manufacturer’s instructions for the growth stage (typically a “growing” or “mature” recipe for lettuce). Always add nutrients to water, not water to nutrients, to prevent precipitation.
- Common EC for seedlings is 800
- Stir the solution vigorously to ensure everything is fully dissolved.
Step 5: Calibrate the Chemistry
- Check and Adjust EC/TDS: Use your meter. For initial planting with young lettuce seedlings, aim for the lower end of the range: EC 1.2 – 1.6 mS/cm.
- Check and Adjust pH: This is critical. Use a reliable pH meter and adjust using pH Down (phosphoric acid) or pH Up (potassium hydroxide) solutions. The ideal range for lettuce is 5.5 – 6.0. Stir thoroughly after every adjustment and wait a few minutes before re-testing.
Phase 3: Introducing the Plants
Step 6: Prepare Seedlings (The Transplant)
- Start seeds in a sterile, low-nutrient starter medium like rockwool cubes or oasis cubes.
- Your seedlings are ready for transplant when they have 2-3 true sets of leaves and the roots are emerging from the starter plug.
- Key Point: The roots must be long enough to dangle into the nutrient solution (at least 2-3 cm) as soon as you place them in the raft.
Step 7: Launch the System
- Carefully place each seedling into a hole in the raft, ensuring the starter plug is snug.
- Gently place the fully loaded raft onto the surface of the nutrient solution.
- Double-check that the roots of every plant are making contact with the water.
- Power on the air pump. Your commercial DWC system is now active.
(Visual/Table: Initial Water Parameters Checklist)
| Parameter | Target for Lettuce Seedlings | Tool Needed |
|---|---|---|
| pH | 5.5 – 6.0 | pH Meter |
| EC | 0.8 – 1.2 mS/cm | EC/TDS Meter |
| Water Temp | 18 – 22°C (65 – 72°F) | Thermometer |
| Aeration | Vigorous “boiling” surface | Visual Check |
The system is now built and running! The next section will cover how to keep it that way with a straightforward management routine. Shall we proceed to “4. Operation & Maintenance: The Daily & Weekly Routine”?
5. Troubleshooting Common Commercial DWC Issues
Even in a well-managed system, issues can arise. Here’s how to diagnose and solve the most common problems in a commercial raft DWC setup.
Problem 1: Root Rot (Pythium)
- Symptoms: Roots turn from healthy white to brown or slimy. They may have a foul odor. Plant growth stalls, and leaves wilt.
- Primary Causes:
- High Water Temperature: This is the #1 cause. Pathogens thrive in warm water.
- Insufficient Oxygen: A failing air pump or clogged airstone creates anaerobic zones.
- Solutions:
- Immediate: Check and strengthen your aeration. Ensure the water is “boiling.”
- Critical: Lower the water temperature. Use a water chiller, shade the reservoir, or use insulating materials. The golden zone is 18-22°C (65-72°F).
- Treatment: For an active infection, consider a beneficial microbe product containing Bacillus amyloliquefaciens or a similar strain, which outcompetes the pathogens. As a last resort, a registered hydrogen peroxide product can be used, but it is a harsh sterilant.
Problem 2: Stunted or Discolored Growth
This is almost always a nutrient or pH issue.
- Symptoms: Yellowing leaves (especially older ones), purpling stems, or generally slow, weak growth.
- Causes & Solutions:
- Check pH First! If the pH is outside the 5.5-6.5 range, certain nutrients become “locked out” and unavailable to the plant, even if they are present in the solution. Correcting the pH often solves the problem within days.
- Check EC:
- Low EC: Pale plants indicate hunger. Increase nutrient concentration.
- High EC: “Nutrient burn” with dark, sometimes curled, leaf tips. Dilute the solution with fresh water.
- Ensure you are performing weekly nutrient solution changes to prevent imbalances.
Problem 3: Algae Growth
- Symptoms: Green, slimy buildup on raft surfaces, reservoir walls, or airstones.
- Cause: Light is leaking into the nutrient solution. Algae compete with your plants for nutrients and oxygen.
- Solution:
- Prevention is key. Ensure your rafts fully cover the water surface and that your reservoir or liner is completely opaque. No light should enter the root zone.
- Physically remove algae during your weekly reservoir clean-out.
Problem 4: Wilting Plants
- Symptoms: Plants droop, even when the reservoir is full.
- Causes & Solutions:
- Pump Failure: The most urgent cause. Check your air pump immediately. No bubbles = plants are drowning. This is why a backup pump is critical.
- Root Damage: If the roots were damaged during transplant or by disease, they cannot take up water.
- High EC: An excessively high nutrient concentration can actually pull water out of the plant’s roots (reverse osmosis).
Problem 5: Premature Bolting (Running to Seed)
- Symptoms: The lettuce central core elongates, forming a seed stalk. Leaves become bitter, tough, and the head stops forming, rendering the crop unmarketable.
- Primary Causes (The “Stress Triggers”):
- High Air Temperature: This is the most common trigger. Lettuce is a cool-weather crop. Consistently high temperatures, especially at night, signal the plant to complete its life cycle.
- High Root Zone Temperature: While we focus on water temp for root rot, warm water in the reservoir also contributes to overall plant stress, and primary trigger in other hydroponic sytems.
- Photoperiod: Long daylight hours (over 12-14 hours) can induce bolting in some varieties.
- Other Stresses: Inconsistent watering (not an issue in DWC) or nutrient stress can also contribute.
- Solutions and Preventative Strategies:
- 1. Variety Selection (THE MOST IMPORTANT SOLUTION):
- Choose Bolt-Resistant (Thermotolerant) Varieties. This is your number one defense. Look for specific terms like “slow to bolt,” “heat-resistant,” or “summer crisp.” Batavia types (e.g., ‘Nevada’, ‘Sierra’) and some loose-leaf varieties are far superior in heat than traditional Butterheads or Iceberg.
- 2. Environmental Control:
- Shade Cloth: Use a 30-50% white or aluminet shade cloth over your greenhouse or growing area during the hottest parts of the day to reduce air temperature and light intensity.
- Evaporative Cooling: If in a greenhouse, use swamp coolers (evaporative cooling) to actively lower the air temperature.
- Reservoir Cooling: Maintain that crucial 18-22°C (65-72°F) water temperature. A cool root zone can help offset stress from higher air temperatures. This is your most important defence, bury your RDWC reservoir in the ground, and adding ice can help to bring Temp down in heatwaves.
- 3. Operational Timing:
- Seasonal Planning: Grow heat-sensitive varieties during your cooler seasons (autumn, winter, early spring). Reserve the most bolt-resistant varieties for the peak of summer.
- Succession Planting: Plant smaller batches more frequently to ensure you have plants at various stages, rather than one large crop that all hits the vulnerable stage during a heatwave.
- 1. Variety Selection (THE MOST IMPORTANT SOLUTION):
Troubleshooting at a Glance
| Symptom | Most Likely Cause | Immediate Action |
|---|---|---|
| Brown, Slimy Roots | High Water Temp / Low O₂ | Check temp; Verify aeration |
| Yellowing Leaves | pH Lockout / Low EC | Test and adjust pH & EC |
| Green Slime in Tank | Light Leak | Cover all light sources |
| Plants Wilting | Air Pump Failure | Check pump & power supply |
| Central stalk elongates, bitter taste | High Air/Root Temp, Wrong Variety | Verify variety is bolt-resistant; Implement shade/cladding; Cool reservoir |
Conclusion: The Path to Commercial Success
You have now moved from a simple blog concept to possessing a complete, structured blueprint for a commercial-scale Deep Water Culture operation. Hydroponic lettuce farming using Deep Water Culture (DWC) systems offers a sustainable and efficient method for growing high-quality produce. By following the steps outlined in this guide, you can set up, maintain, and expand your DWC system to achieve successful lettuce cultivation. Whether you’re an urban farmer or a commercial grower, this innovative approach can help you overcome common challenges and contribute to a more resilient food network.
The key takeaways for your commercial success are:
- Aerate by Surface Area: 4+ LPM per 2-4 m².
- Keep the Reservoir Cool: 18-22°C is non-negotiable for healthy roots and to keep from bolting
- Manage Your Chemistry: Consistent pH and EC monitoring is the foundation of plant health.
- Be Proactive, Not Reactive: A strict weekly maintenance schedule prevents nearly all common problems.
This tutorial provides the foundation. Your experience and observation will now be your best tools for refinement and scaling. We wish you the greatest success in your hydroponic journey.
-

Yellow Sticky Fruit Fly & Fungus Gnat Traps
R11 Select options This product has multiple variants. The options may be chosen on the product page🏗️Bright yellow colour attract flying insects
🏗️Odourless, Safe and Non-toxic
🏗️Durable – UV r… -
STS

Binary Hydroponic Kit – Make 2x5L Alpha & ...
Original price was: R220.R135Current price is: R135. Add to basket🌱 Complete 2-part Hoagland formula. 🌱 Make 5L of Alpha and Omega concentrates. 🌱 Provides all…
-
STS
Vermiponic Planter Kit – 5L Passive Organic Hyd...
Original price was: R1,150.R795Current price is: R795. Add to basket🌱Passive | Biological | Ready-to-Grow
🌱Zero Pump| Electricity | Nutrient Cost
🌱 2000ml Verm… -
Potato Grow Bag – Heavy Duty (38L) with H...
R150 Add to basket🌱 Grow Potatoes anywhere!
🌱 UV-resistant 38L bag with easy-harvest flap.
🌱 Reinforced handl…
🌱Let’s embark on this journey together and discover the future of lettuce farming in Africa!