Mastering straw pasteurisation, hot or cold, unlocks cost-effective gourmet oyster cultivation without expensive equipment.
Summary
This note details two primary methods for pasteurising straw: hot water and cold lime. Hot pasteurisation (60-80°C) kills most contaminants while preserving beneficial thermophilic bacteria. Cold pasteurisation uses hydrated lime to rapidly raise pH, inhibiting competitors. Both methods are low-tech, suitable for urban farmers, and crucial for preventing contamination in oyster mushroom grows.
Introduction: The Urban Farmer’s Foundation
Growing gourmet oyster mushrooms is an ideal entry point for urban farmers, especially when bypassing costly equipment like flow hoods and sterilizers. The foundation of any successful grow, regardless of scale, is clean, uncontaminated spawn. This guide focuses on pasteurising straw – a cheap, readily available, and selective substrate perfect for oyster mushrooms. We’ll compare the energy-efficient cold lime method with traditional hot water pasteurisation, and introduce a hybrid approach.
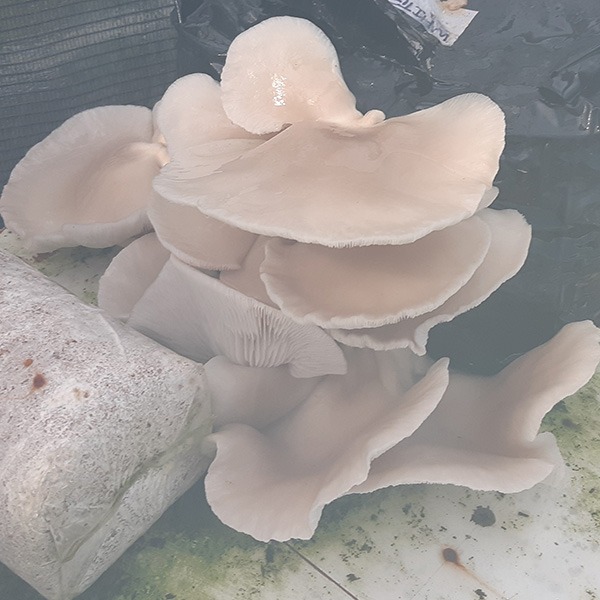
Image to right is White [Pearl] Oyster grown on Low Tek pasteurized Korog [Triticale] hay. Hay = straw and seed…
The Problem: Contamination in Low-Tech Systems
When cultivating mushrooms on simple substrates like straw, the primary challenge is contamination. Wild moulds and bacteria are eager to colonise the nutrient-rich straw, outcompeting your precious mushroom spawn. While sterilisation (killing all microorganisms) is ideal for some substrates, straw’s structure and the nature of oyster mushroom cultivation allow for pasteurisation – a process that reduces the contaminant load significantly while preserving beneficial organisms. The goal is to create a substrate where the mushroom mycelium has a distinct advantage.
The Principle: Inhibition, Selectivity and Biological Occupation
Pasteurisation is not sterilisation. Its purpose is to selectively suppress competing organisms while leaving the substrate in a condition that favours the rapid establishment of the mushroom mycelium.
1. Heat or Chemical Inhibition
Hot Pasteurisation: Heating the substrate to approximately 60–80°C for a controlled period suppresses most vegetative bacteria, moulds and other susceptible organisms. Heat-resistant organisms, particularly spore-forming bacteria such as Bacillus, survive as dormant endospores and subsequently re-establish themselves as the substrate cools.
Cold Pasteurisation (Lime Method): Hydrated lime raises the substrate pH, typically into the strongly alkaline range. This creates an environment that inhibits many common competitors while leaving the physical structure and nutritional character of the substrate intact. Once the substrate is returned to suitable conditions, organisms capable of tolerating or surviving the treatment remain.
2. Selectivity
Pasteurisation does not simply create an empty substrate. The straw or other lignocellulosic feedstock remains the food and habitat for the mushroom.
The important change is selectivity: many competing organisms are suppressed, while the mushroom mycelium is introduced into a substrate where its ability to rapidly exploit the available carbon and structure gives it a competitive advantage.
The substrate therefore becomes selectively favourable rather than sterile.
3. Biological Occupation
This residual biology can be particularly important following hot pasteurisation. Resistant organisms and endospores, notably Bacillus subtillis species – also known as ‘Hay Bacillus’, survive the treatment and subsequently become active.
These organisms can occupy ecological space, consume available resources and, in some cases, produce compounds that inhibit competing microorganisms. Rather than creating a sterile substrate, pasteurisation can therefore leave behind a biological occupation that complements the rapidly colonising mushroom mycelium.
The result is not a biological shield in the sense of an impenetrable barrier. It is an occupied, selectively conditioned substrate in which the cultivated mushroom has been given a strong competitive advantage.
Pasteurisation therefore works by three linked mechanisms:
- Suppress the competitors.
- Preserve the selective nutrition and habitat.
- Allow the desired biology to occupy the substrate first.
Hot Water Pasteurisation: The Traditional Approach
Hot water pasteurisation is a well-established method that leverages heat to reduce the microbial load.
The Science: As Louis Pasteur discovered, heating liquids to specific temperatures (around 65°C for mushroom substrates) kills harmful microorganisms without boiling, thus preserving the substrate’s integrity. For straw, the target is typically 60-80°C for 1-2 hours. This temperature range is high enough to eliminate most contaminants but low enough to leave behind beneficial thermophilic bacteria.
Practical Application:
1. Equipment: Requires a large steel drum or container, a heat source (gas burner), and a way to hold the straw submerged (e.g., a mesh bag weighed down with a brick or block).
2. Process:
- Chop straw (1-5cm lengths) for better handling and nutrient access. Using straw pellets is advantageous.
- Place chopped straw in a heat-resistant bag or wire basket.
- Fill the drum with water, submerge the straw container, and heat the water.
- When the water reaches 60°C, start a timer for 2 hours.
- Monitor the temperature. If it rises above 70°C, reduce heat. If it drops below 65°C, increase heat. The goal is to maintain the 60-80°C range.
3. Drainage: After the timed period, drain the straw thoroughly. It must be “at field capacity” – moist but with no dripping water. This is critical to avoid anaerobic conditions.
Benefits: Effective at reducing contaminants, preserves beneficial thermophilic bacteria which may offer a biological defence.
Drawbacks: Requires significant heat input (gas, electricity), a large container, and careful temperature monitoring.
Cold Pasteurisation (Lime Method): The Low-Tek Solution
Cold pasteurisation, often referred to as “Low Tek,” utilises calcium hydroxide (hydrated lime) to achieve a similar outcome with less energy.
The Science: Initiated by Dr. Stoller and popularised by companies like Aloha Medicinals, this method rapidly raises the straw’s pH to an alkaline level (around 11-12). This high pH is lethal to many common bacterial and fungal contaminants but is tolerated by the mycelium of oyster mushrooms.
Practical Application:
1. Equipment: A large container (drum, tub), old pillowcase or shade netting for draining, and hydrated lime (calcitic lime, not builder’s lime or dolomitic lime high in magnesium).
2. Process:
Chop straw into 1-5cm lengths. This increases surface area for mycelial colonisation and water absorption.
Soak the straw in lime water overnight (12-24 hours). A common ratio is 1 tablespoon of hydrated lime per 10 litres of water. The straw should be submerged in the lime solution, often contained within an old pillowcase for easy handling.
3. Drainage: Drain the straw thoroughly until no excess water drips out. This is crucial.
Benefits: Low energy input, no need for precise temperature control, uses inexpensive chemicals, very effective against common contaminants.
Drawbacks: Requires handling hydrated lime (wear gloves and mask), must use the correct type of lime, and careful drainage is still essential. Using “hay” (straw with seeds) is possible but may lead to some seed germination.
Bundu Tek: A Hybrid Approach
This is a process as used at the STS using Straw Pellets and boiling water, with BioaKt. Many growers find a hybrid approach yields excellent results, even with CVG (Coco-Vermiculite-Gyspum). This often involves a combination of hot water soak with a lime bath, to leverage the benefits of both methods. The key is to find what works best with your local straw and conditions.
Practical Application: Preparing and Inoculating Straw
Regardless of the pasteurisation method, the subsequent steps are similar:
1. Spawn Ratio: Combine the pasteurised, well-drained straw with your grain spawn. For oyster mushrooms, a spawn rate of 2-3% of the dry substrate weight is common. For a 20-litre bucket accommodating about 1kg of dry straw, this means 20-30g of spawn.
2. Packing: Stuff the straw-spawn mixture firmly into your fruiting containers. This can be poly bags, buckets with drainage holes, or other suitable containers. Ensure holes are staggered around the container for air exchange and drainage.
3. Colonisation: Incubate the inoculated containers in a dark, room-temperature environment (around 20-24°C) for 7-14 days. You will see white mycelium colonising the straw.
4. Fruiting: Once fully colonised (“mycelium running”), expose the containers to fruiting conditions: high humidity (80-90% RH), fresh air exchange (FAE), and indirect light. Oyster mushrooms will typically “pin” (form baby mushrooms) near the holes.
Pitfalls of Pasteurisation: Moisture Management is King
The most common failure point in both hot and cold pasteurisation is improper moisture management.
Too Wet: If the straw is not drained sufficiently, water will pool at the bottom of the bag or container. This creates anaerobic conditions where aggressive bacteria (like the dreaded “wet spot” Bacillus) thrive, leading to contamination and crop failure.
Too Dry: While less common after pasteurisation, if the straw dries out too much, the mycelium will struggle to colonise.
Solutions:
Manual Squeezing: For supplemented substrates (like those with bran), you may need to manually squeeze out excess water.
Drainage Holes: Ensure adequate drainage holes in your fruiting containers.
Dry Vermiculite: Adding up to 10% dry vermiculite by volume to the mix can help absorb excess moisture and maintain an aerobic environment.
Conclusion: Low-Tech, High-Yield Potential
Pasteurising straw, whether through hot water or cold lime methods, offers a cost-effective and accessible route to growing gourmet oyster mushrooms. By understanding the principles of selective inhibition and managing moisture levels meticulously, growers can achieve professional results without significant investment in specialised equipment. This makes it an ideal technique for urban farmers and anyone looking to cultivate mushrooms sustainably.
-
STS
G-Shield — LAFEGE Cutworm, Aphid & Seedling Root Armor
Original price was: R280.R195Current price is: R195. Add to basket🧄 LAB-fermented garlic with SAC enrichment
🌿 Garlic & peppermint botanical defense
🛡 Soil-zone and foliar pest deterrent
🌱 Root-zone support for young plants -
STS
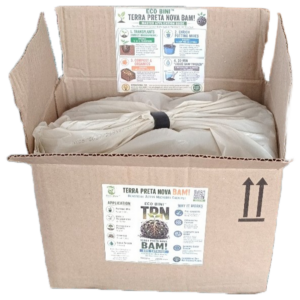
Eco Bini™ Terra Preta Nova BAM! Soil Catalyst | 5 Litre
Original price was: R340.R239Current price is: R239. Add to basket🛠️ Biologically pre-charged Terra Preta Nova Soil Catalyst
🛠️ Premium macadamia shell Granular Activated Carbon (GAC)
🛠️ Beneficial Active Microbes (BAM!)
🛠️ Zero nutrient lockout • Permanent microbial habitat • Ready to use -
STS
Passive Organic Hydroponics Start Kit & Course | Vermiponics
Original price was: R499.R359Current price is: R359. Add to basket🛠 5L Passive Vermiponic Starter System
🛠 Includes 2 dm³ VermiCore Living Growth Medium
🛠 Free STS Practical #11 Digital Manual Included
🛠 Learn to Build & Scale Your Own Vermiponic Systems -
STS
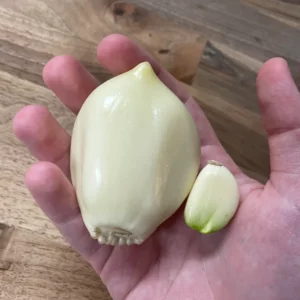
Elephant Garlic Tincture (1:5 AGE Extract ) | 20.4% ABV
Original price was: R450.R295Current price is: R295. Add to basket🛠️Concentrated, Biologically Active Phytochemical Extract
🛠️ Optimized 1o-Min Air-activated Allicin window (AGE)
🛠️1:5 Fresh Organic Garlic Ratio
🛠️Stable 20% ABV Matrix – Long shelf life
Socratic Questions
- What is the difference between hot and cold pasteurization for mushrooms?
- How to perform cold lime pasteurization on straw?
- Best low-cost pasteurization methods for small-scale farmers?
- How to prevent contamination on pasteurized straw?
- Does hot pasteurization produce higher yields than cold?